You feel it before you see it. The foil sits clean in the board, the edges are sharp, and the mark catches the light without glare. That first touch tells your customer this is something worth keeping.
Here’s how to get it right with practical, shop-floor tips for foil blocking on cartons, sleeves, and rigid lids. In the UK, ‘foil blocking’ means hot foil stamping with a crisp, debossed feel. We’ll focus on the press controls that keep that result stable in production.
What makes foil blocking look premium in the hand?
Premium finish shows up in three places your customer notices instantly: edge definition, placement, and consistency. Clean edges signal care and accurate placement builds trust. Consistent depth keeps sets looking like they belong together. You get there by holding even die-face temperature, keeping the head square to the platen, and timing dwell so the die seats cleanly without scuffing.
With decades of UK press-building experience, our team understands how small adjustments change finish quality and repeatability.
Is foil‑blocked packaging recyclable?
Yes, when you use transfer foils on paper or board, the decoration typically remains sortable and repulpable. In many cases, foil blocking on paperboard can enter material recovery streams when specified and processed correctly. During stamping, only a thin lacquer/adhesive layer bonds to the board as the PET carrier comes away. Always check local mill guidance.
How do you keep foil blocking edges sharp without raising temperature?
Start with temperature you can prove. Hot-foil transfer activates thin lacquer and adhesive layers that bond to the board as the PET carrier releases; even die-face temperature after heat-soak ensures clean release and sharp edges. Confirm die-face temperature with a surface probe at the corners and centre, then heat-soak before first-off. On soft boards, add a thin make-ready. If fine lines soften, ease inside corners on the die and use a timed dwell. Stable temperature helps reduce rework and supports a high first‑good rate.
Do coatings and laminates affect foil blocking results?
Yes. UV varnish, laminates, and heavy inks change surface energy and can blunt adhesion or edge clarity. Match the foil grade to coated stocks, prove die-face temperature with a probe, heat-soak, and, if needed, add a thin make-ready. When in doubt, run a quick test on production board and ask your foil supplier for a grade recommendation.
If a corner prints light, re-level the platen before you push heat. Don’t mask a level issue by raising temperature.
Which dies work best for foil blocking logos and small type?
Use brass dies for logos and fine detail. Brass holds crisp edges and resists heat creep under daily use. For personalisation or variable initials, pair brass type with a simple jig so placement stays repeatable.
Our in‑house team designs and makes Hot Foil Dies and can advise on die depth and relief that suit your board. For foil blocking on textured stocks, test small counters on live board before signing off artwork. Beyond gold and silver, pigmented, matte, pearlescent and holographic foils are common on cartons. Pick a grade matched to your stock and test on the production board to confirm edge definition and adhesion.
If you’d like to talk through your own setup or ask how our machines handle registration and repeatability, contact our team for straightforward guidance
How do you stop placement drift in foil blocking at production speed?
Placement accuracy sells the pack before anyone reads the logo, and reliable foil blocking at speed depends on fixtures that keep parts square and stable. Tight placement lowers complaint rates on premium lines and protects repeat orders. Use hard stops and fixtures. An L‑stop squares a carton lid, a pocketed nest holds a sleeve flat, and registration pins stabilise larger dies during hot changes. Label fixtures and add a photo to the setup pack so any operator can rebuild position without guesswork. Reference the seam or fold on folded work, not the raw edge.
If you need a locator jig or a shaped nest for a tricky part, our Engineers design and machine fixtures to suit.
What should artwork handoff include for foil blocking?
Supply vector art, note the board and coating in the job, and set minimum strokes and counters that suit the stock texture. Keep very fine strokes out of deep textures and avoid stacking micro‑type close to a heavy block. If a mark spans a hinge or fold, break the art at the fold line and anchor each side to a hard reference on the fixture.
When should you move from a manual rhythm to pneumatic support?
Manual presses handle short runs and personalisation well in retail counters and short batches. As repeat SKUs and daily volume rise, cycle time spreads and operators “chase” depth late in the shift. Pneumatic actuation smooths the stroke and reduces fatigue so pace and look hold steady when orders stack up. Teams typically see steadier results on repeat SKUs when the stroke stays smooth late in the shift.
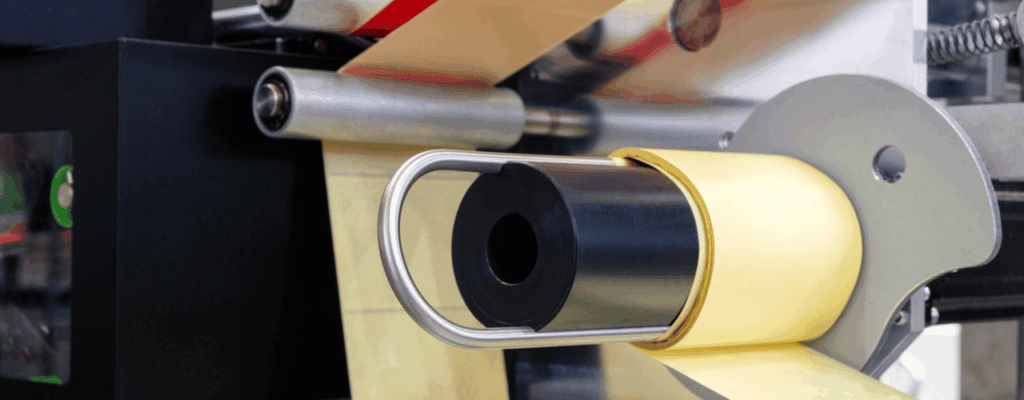
Which hot-foil press format suits cartons and rigid lids?
For cartons, sleeves, and rigid lids, many teams run flat‑on‑flat hot foil stamping for precise placement and a clean debossed feel. Round‑on‑flat and round‑on‑round suit continuous or curved work, but a rigid, square flat‑bed usually holds registration steady on packaging boards. Pick format once, then focus improvement on fixtures and changeovers.
How do you reduce foil blocking changeover time on short runs?
Treat changeover as part of production. On short‑run foil blocking jobs, seconds saved between dies count. Pre‑warm the next die, keep a labelled fixture library, and time clamp‑off to first good so you can improve the routine. Log the result with the run pack; a quick-change base and a tidy bench save minutes across a day of high-mix work. Shorter swaps keep launch-week schedules intact when variants stack up.
What is a simple process window you can teach?
Write a short process window so quality becomes teachable and repeatable:
- Temperature: controller set point plus confirmed die surface reading.
- Pressure: machine setting, make-ready notes, and a retained reference sample (kept with the run pack).
- Dwell: timed press, not hand‑counted.
- Stock notes: board, thickness, coatings, batch.
- Fixture: photo and ID so the set-up can be rebuilt.
Keep a signed master sample in the job pack and compare live work before you adjust settings. Note die ID and fixture photo on the pack cover. A clear window shortens training time and reduces ‘tribal knowledge’ risk during holidays and peaks. Review the window quarterly so settings reflect live stock changes and keep first-good rates steady.
Common finish faults and quick fixes
- Shallow, dull mark: confirm die-face temperature, heat-soak the head, and add a thin backing sheet on soft stock.
- Edge shine outside the mark: reduce pressure, add make-ready, and check platen parallelism.
- Placement drift over a run: add a positive stop; reference seam/fold; add a set-up photo to the job pack.
- Fine lines closing on texture: ease inside corners on the die; check dwell is timed (use a timer, not a head-count).
Where can you get practical help?
We build and recondition presses, machine dies in‑house, and engineer fixtures on real products.
If you need a die or guidance on detail and counters, see Hot Foil Dies. To discuss a fixture or a tricky placement, talk to our Engineers. If you’re weighing budget and lead‑time options, ask about reconditioned presses. Ready to plan next steps? Contact us!
Written by Metallic Elephant